Monday, April 2, 2012
I LOVE THE goodwill !!!!
Thursday, March 15, 2012
Happy Birthday Tablecloth to sign
First off I purchased a $5 flat twin sheet from Walmart. I then cut the side that had the longer edge just to match the other end of the sheet.
I then chose my fabric and ironed on this fabric interfacing from www.silhouetteamerica.com or amazon carries it as well.This is just a quick pic of the screen
I then just cut out by hand all the flags to go on the birthday banner and also used the interfacing on this so that I could quickly iron it on to the sheet/tablecloth for easy stitching.
After I ironed them on I then took Rick Rack and just pinned it along the fabric banners to look like the rope they were hanging from and I carried it down the sides to the seem of each end...See Below.
Here is the side on the 2nd one. ENJOY this was easy to make from start to finish about one hour...including where I stitched around each flag and sewed on the Rick Rack..and what a great gift for a first birthday party to someone !!
I am linking up to the parties below !!
Sunday, March 4, 2012
Initial Towel
Then I cut 2 squares out that would fit on the silhouette mat and used the silhouette sewable interfacing that irons on. You use the iron on the hottest setting and make sure you get all corners and sides fused well.
You then will see that once you pull off the backing of the interfacing it leaves a clear film on the fabric
I then put this on my mat ready to go into the silhouette. I use the cricut mats you can purchase from the store and cut down to fit the silhouette since it only accepts 9inches in width. (these are only $11.99 for 2 verses silhouettes $24.99 for 2
I then have 3 the letters cut out from the machine
Now they are ready to be ironed onto the towel, or blanket or anything of your choice !!!
Here is a blanket I did for a friend to give her niece. I acutally ended up once they are ironed on sewing the letters on with a decorative stich for more security to item.
ENJOY !!!!
Monday, February 27, 2012
Valentines Puppy
I saw this in a book and just thought I would share my creation !!!
Then I mixed vanilla and chocolate icing and dipped the hearts in them. I used caramel and softened it in the microwave and used a spoon to flatten it. Then I cut out the ear shape with a butter knife. I used white icing and chocolate chips for the eyes...Red hots for the nose and Candy hearts for the tongue. I used the oreo cookies with one vanilla and one chocolate side and crushed those for the puppy spots.
These were such a hit at my 3 year olds Valentine Party for school !!! ENJOY !
Friday, February 10, 2012
Houndstooth Table..an old Oak kitchen table affair
I had a friend throwing away this old oak kitchen table and chair set...I of course entertain alot and thought I could do something with it. I sanded down the table and used Red Rustoleum paint and rolled it on the table and chairs. I did have to use a brush in some areas. It took about 4 coats and hours and hours of drying time. I then cut out the houndstooth stencil on my silhouette machine and used contact paper that you use to line your cabinets since it is only about $7.99 for 12ft vs silhouette vinyl or craft vinyl which runs $9.99 for just 2 24 inch sheets.
My husband had to help me layout the pattern because it did literally make me cross my eyes..
I then rolled over the stencils with the aqua blue paint which was a valspar paint since it can be tinted. After 2 coats and dry time...I then used the clear coat from Hobby Lobby that runs about $39.99 unless you use a off coupon. I then mixed equal parts and poured it over the tops of the chairs and table top. It says to allow 24 hours dry time which I allowed about 48 hours and that still wasn't enough time because the chairs did crease and have leaves stick to them once I placed it outside. Other than that it has held up great with rain and snow...Good Luck and Enjoy !
Goodwill Lamp FInd
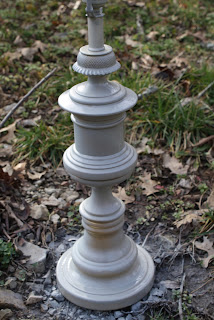
Lucky Day at the Goodwill I found this lamp for $5.99 and this oak picture frame for $3.99
I then primed them both and spray painted them black
Added a piece of fabric that I had left over from some curtains I made
Then I took the electrical cord out of the lamp and acutally ended up removing the top lightbulb holding piece..then with gorilla glue..I added and made a table !!
I then primed them both and spray painted them black
Added a piece of fabric that I had left over from some curtains I made
Then I took the electrical cord out of the lamp and acutally ended up removing the top lightbulb holding piece..then with gorilla glue..I added and made a table !!
Thursday, February 9, 2012
Mommie's boys
Recent photos done by Tena Wood PhotographyTena Wood Photography...This is my Niece's Grandmother her Mom took the pics and as a Mother & Daughter team,,they turned a fun day at the factory and the Vineyards into fabulous memories !!!
Subscribe to:
Posts (Atom)